As I had mentioned in the
last update, I replaced the desk drawers on the left side of my balcony with a new sub irrigated planter box. I found a wooden box on the street corner and it happened to be the perfect size.
To make the planter sub-irrigated, I needed some 2 liter bottles and a piece of PVC pipe. I had these lying around my closet, so it was a piece of cake.
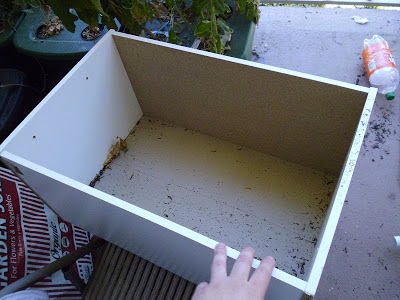 |
| The box |
First step was the clean out the interior of the box and remove some screws attached to the side.
 |
| The reservoir |
Using 3 two liter bottles, I created the reservoir. I poked holes on the sides and top to allow for water to exit and leave the reservoir.
 |
| Filling Part 1 |
The box was then moved to it's final location, where the reservoir was reassembled and fitted into place by soil.
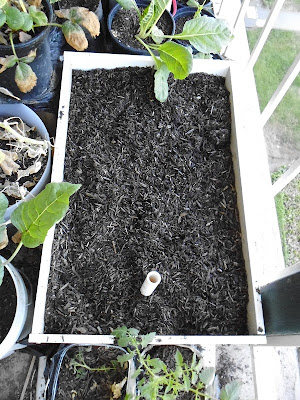 |
| Filling Part 2 |
The PVC pipe was reattached to the notch I cut for it and the rest of the box was filled. It's that easy to create your own sub irrigated planter.
 |
| Location in garden |


No comments:
Post a Comment
Hi folks, please only leave comments relative to the blog post. All spam will be removed and spammers will be blocked.
Note: Only a member of this blog may post a comment.